


COVERING WITH FILM - Part 2
6.At this point, the film on the frame has masses of static, which can cause problems. I get rid of this by quickly steaming it on both sides over a kettle and leaning it upright to dry for about 5 mins.
7.Place the wing/tail on a NEW piece of newspaper and VERY LIGHTLY spray all over the top surface from 18"-24" away. Adhesive adds weight. You need JUST enough and no more! Experts brush thinned adhesive on with a small brush. I always end up with the wing sticking to me, so I use the spray method. Dont be tempted to give it one more spray for luck! If the wing sticks to any newspaper or mat, dont try to pull it off. You will break the wing. Have a tin of lighter fuel handy and gently brush some with a small brush between the paper & the wing. The fuel softens the adhesive and you can peel the wing off gently.
8.Place the sprayed wing/tail on your board (NOT the mat, which would get adhesive on it). Then carefully lower the frame & film onto it. The film will not stick all over initially, because of the arc of the wing section. I VERY gently rub the film onto the TE and rear half of the wing to ensure it is stuck and then trim the film away from the TE until it will allow me to roll the wing enough to stick the LE and front of the ribs. See the note above about use of lighter fuel if you get it wrong, or if the wing sticks to the mat. Then I gently cut the whole wing free. You can clean the excess film from the frame by pouring a little lighter fuel and simply pulling the film away.
9.Let the adhesive dry and then we can sort out the dihedral. I do this by making a nick with a razor on the underside of the dihedral breaks. Then I place the wing on a piece of non-stick polythene, weighting the centre section down with pennies and propping the tips to the required height. You should build in any warps specified on the plan at this stage. Pay particular attention to the warps as they are the difference between Flying off the board and not!
10.Set the dihedral with a small amount of glue PUT ON WITH A COCKTAIL STICK. And leave to set thoroughly. You can use cyano, but purists use balsa cement in case they want to make adjustments later. If you are going to make a few wings of the same type (eg F1D), it is worth making a foam or balsa jig which will allow you to set the tip dihedral from the bottom of the wing.
11.Once set, you can lift the covered wing off and fit the tissue tubes, etc.
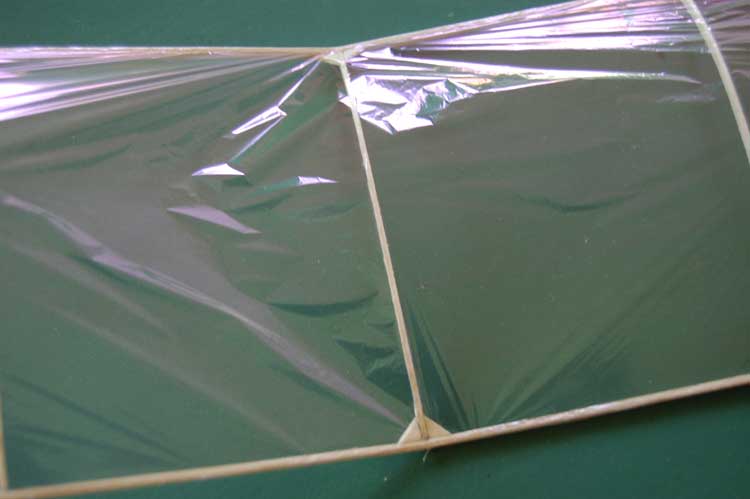
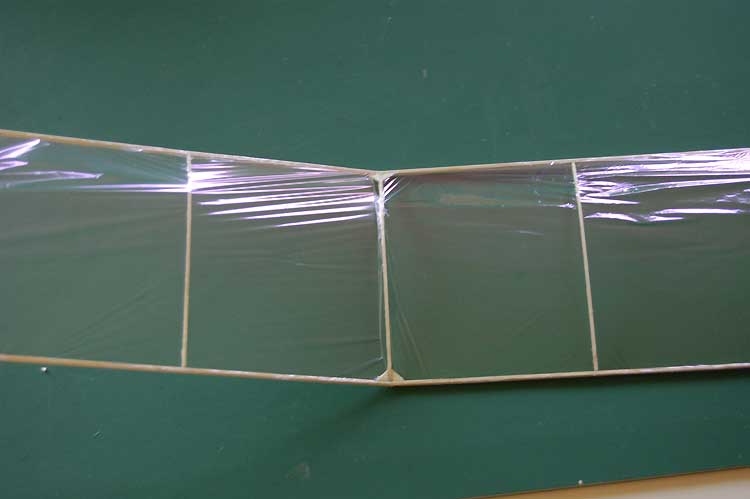
12.At this stage you will have considerable slack in the film at the dihedral breaks. The trick for this is to thoroughly wet a small soft brush with spit and gently brush it along the rib at the dihedral break. The slack gets pulled in like magic and stays there!
7.Place the wing/tail on a NEW piece of newspaper and VERY LIGHTLY spray all over the top surface from 18"-24" away. Adhesive adds weight. You need JUST enough and no more! Experts brush thinned adhesive on with a small brush. I always end up with the wing sticking to me, so I use the spray method. Dont be tempted to give it one more spray for luck! If the wing sticks to any newspaper or mat, dont try to pull it off. You will break the wing. Have a tin of lighter fuel handy and gently brush some with a small brush between the paper & the wing. The fuel softens the adhesive and you can peel the wing off gently.
8.Place the sprayed wing/tail on your board (NOT the mat, which would get adhesive on it). Then carefully lower the frame & film onto it. The film will not stick all over initially, because of the arc of the wing section. I VERY gently rub the film onto the TE and rear half of the wing to ensure it is stuck and then trim the film away from the TE until it will allow me to roll the wing enough to stick the LE and front of the ribs. See the note above about use of lighter fuel if you get it wrong, or if the wing sticks to the mat. Then I gently cut the whole wing free. You can clean the excess film from the frame by pouring a little lighter fuel and simply pulling the film away.
9.Let the adhesive dry and then we can sort out the dihedral. I do this by making a nick with a razor on the underside of the dihedral breaks. Then I place the wing on a piece of non-stick polythene, weighting the centre section down with pennies and propping the tips to the required height. You should build in any warps specified on the plan at this stage. Pay particular attention to the warps as they are the difference between Flying off the board and not!
10.Set the dihedral with a small amount of glue PUT ON WITH A COCKTAIL STICK. And leave to set thoroughly. You can use cyano, but purists use balsa cement in case they want to make adjustments later. If you are going to make a few wings of the same type (eg F1D), it is worth making a foam or balsa jig which will allow you to set the tip dihedral from the bottom of the wing.
11.Once set, you can lift the covered wing off and fit the tissue tubes, etc.
12.At this stage you will have considerable slack in the film at the dihedral breaks. The trick for this is to thoroughly wet a small soft brush with spit and gently brush it along the rib at the dihedral break. The slack gets pulled in like magic and stays there!
You have covered your wing! Now for the tail
Hope this helps
Tom Tomlinson
Hope this helps
Tom Tomlinson